
How I Started My Blog In Under An Hour
Everyone seems to have a blog now, and it is one of the best ways to create and maintain a “personal brand”. It is an easy way to share knowledge with the world, and as your blog grows in popularity people will also begin to recognize you as an authority in whatever field you’re writing about. The hardest part of starting a blog is, well, starting one! Where should you host it? Should you use Wordpress, or some other platform? Should you buy your own custom domain for it or host it on someone else’s platform? Do you have to be a good writer to start a blog? (here’s a hint: if I’m doing it, then you don’t have to be that good of a writer!)
Why GitHub Pages
GitHub Pages is a free offering from GitHub which allows you to host a static website. All you have to do is create a new repository, enable pages to run in that repository, and the work is all done! You just write your pages in Markdown or in HTML and GitHub does the rest of the work to serve up your pages to your audience. Since I’m very comfortable with GitHub and use it all of the time for my normal day-to-day job, it made sense to use it versus learning a new platform.
So how does this work for a blog? Well, blogs are largely static content, usually with a couple of extra features like filtering on tags or having a homepage that lists out your blog entries. Those “extra features” can also be static since they’ll only be updated when a new post is added. For a blog site, you can use GitHub Pages with Jekyll. GitHub supports it “out of the box”, and it’s fairly easy to set up. GitHub also has some supported themes for your blog, although I’m not using one of those. It took me under an hour to set up my blog site on GitHub, and shortly after that I pushed this post to it so that you can follow along and set up your own GitHub Pages blog!
Setting up GitHub Pages
This is probably the easiest step to do here. GitHub really made this one easy - it’s almost as simple as creating a public repository. No, really, that’s it. “But wait, if my repository is public doesn’t that mean that anyone can see the content and assets used to create my blog?” People are going to see it all anyways. Remember - all you’re doing is writing markdown pages (and maybe hosting some images). As long as you secure your main branch you still have full control over the contents of your site.
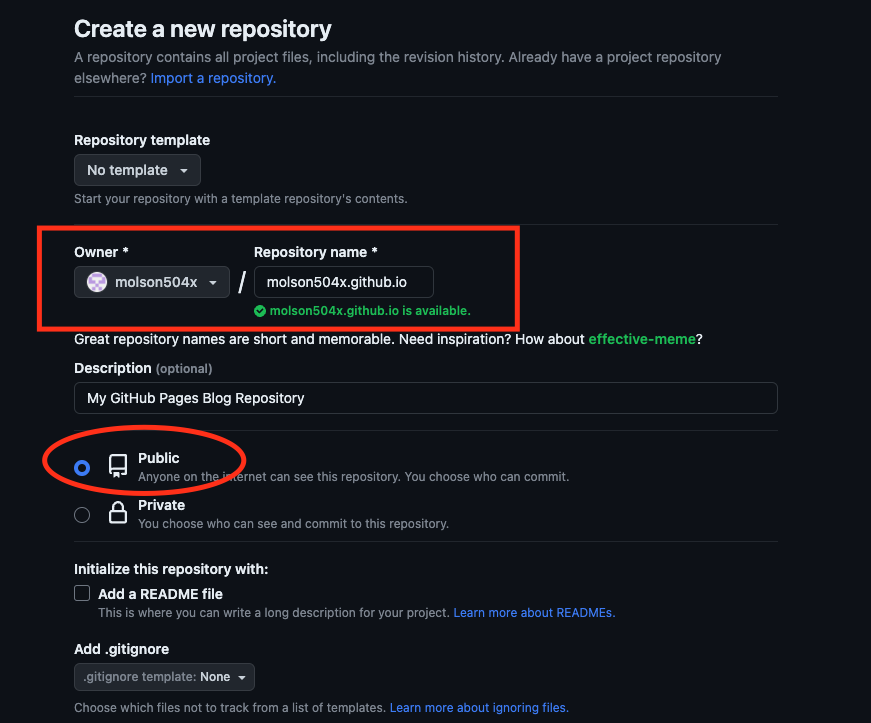
Create a new Repo
GitHub pages are hosted at [your github name here].github.io. While you can create a blog site from a different branch, GitHub recommends that you create your GitHub Pages repo named the same way (so in my case, it’s molson504x.github.io). I chose not to add a README.md file because, well, it’s a blog. I also made the decision to not add a .gitignore file for now - I’ll probably end up doing that later on mostly because I use a Mac and that .DS_STORE file gets really annoying to me.
Deploy your first Page (index.md)
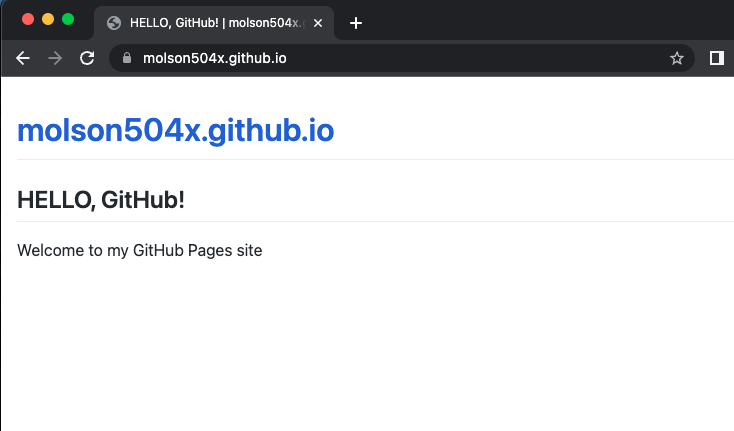
Let’s deploy our first page to our GitHub Pages site. This will be a simple “Hello World” page, just to get us started. I’m going to create a file named index.md with the following contents:
## HELLO, GitHub!
Welcome to my GitHub Pages site
And then I’m going to commit that to my main repo. This will change a lot soon, but for now I wanted to get my first branch created so I can set up branch security, as well as test that GitHub Pages is set up correctly.
Once this file is there, open up Google Chrome and go to your GitHub pages site (https://[your github name here].github.io) and you should be able to see your first page!
Now let’s make a blog!
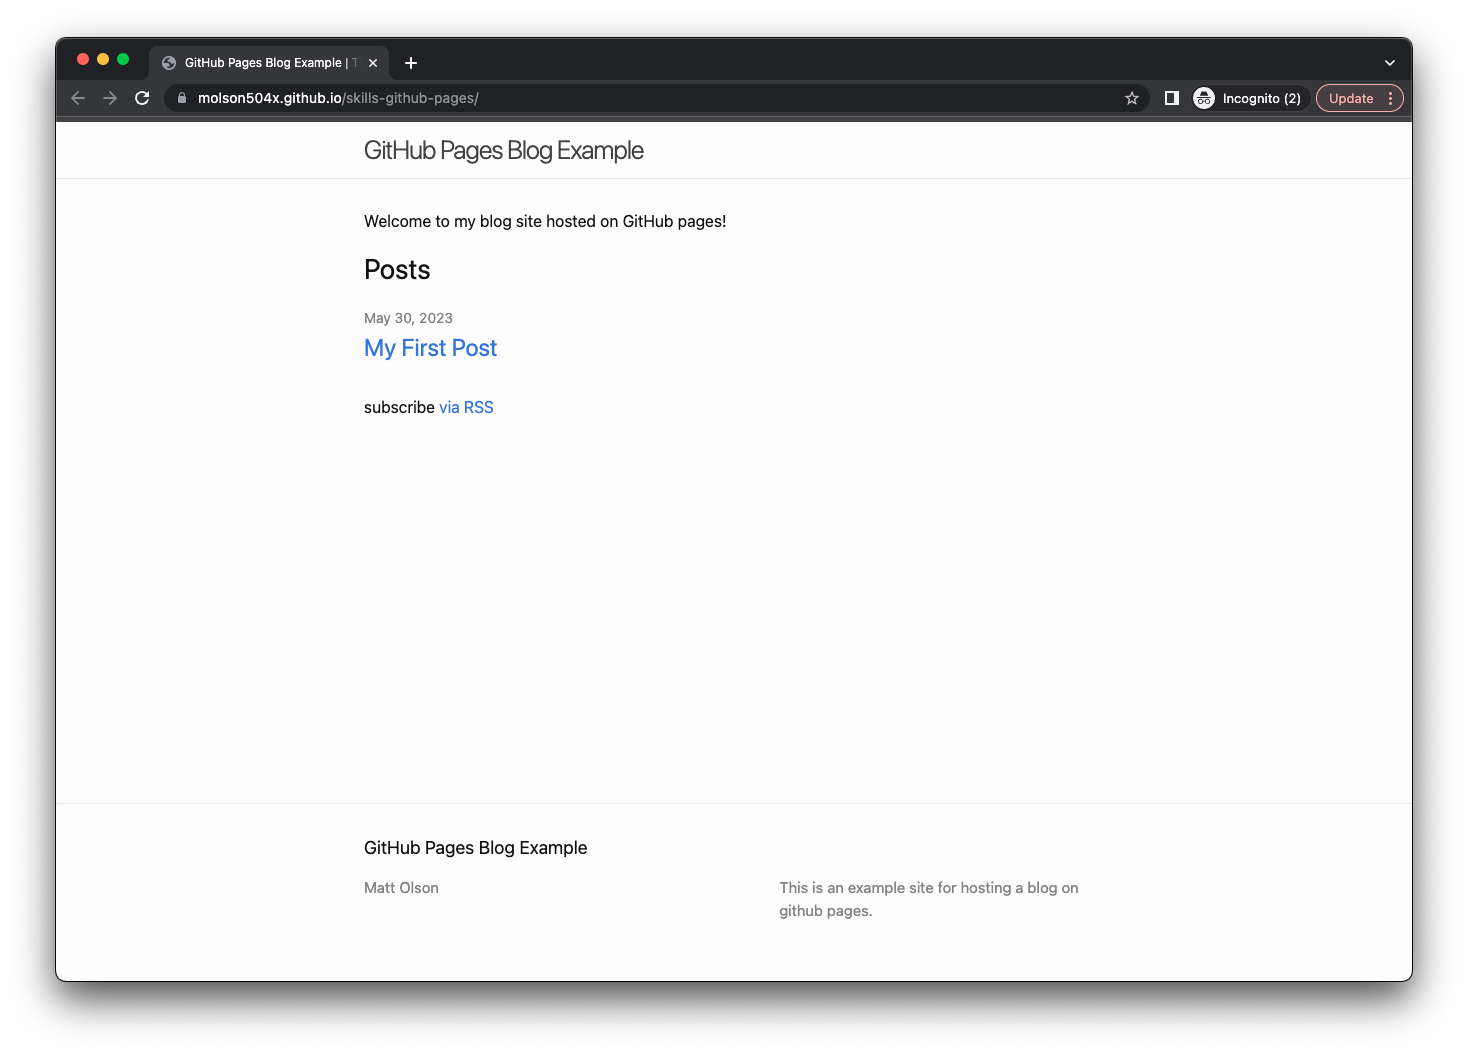
We have GitHub pages working now! Let’s turn our GitHub Pages site into a blog. Since GitHub Pages is already using Jekyll “under the hood” this turns out to be pretty simple - we mostly need to set up the appropriate directory structure, configure Jekyll a bit, and we should be good to go.
_config.yml - Jekyll Configuration
We need to first tell Jekyll how to act, along with a few other details such as who you are, what the name of your blog is, and maybe a description. We also need to set a theme for our blog. This all goes into a simple yaml file:
author: Your Name Here
description: A short description of what your blog is about
title: The name of your blog

theme: minima
Note Other themes for Jekyll may use extra parameters, such as parameters for social media handles or images. This is just for the basic themes offered natively on GitHub. I’m using a modified version of artemsheludko/flexible-jekyll theme for this blog.
After that, if you want to, you can add some introductory stuff at the top of your page:
Welcome to my blog site hosted on GitHub pages!

Your First Blog Post
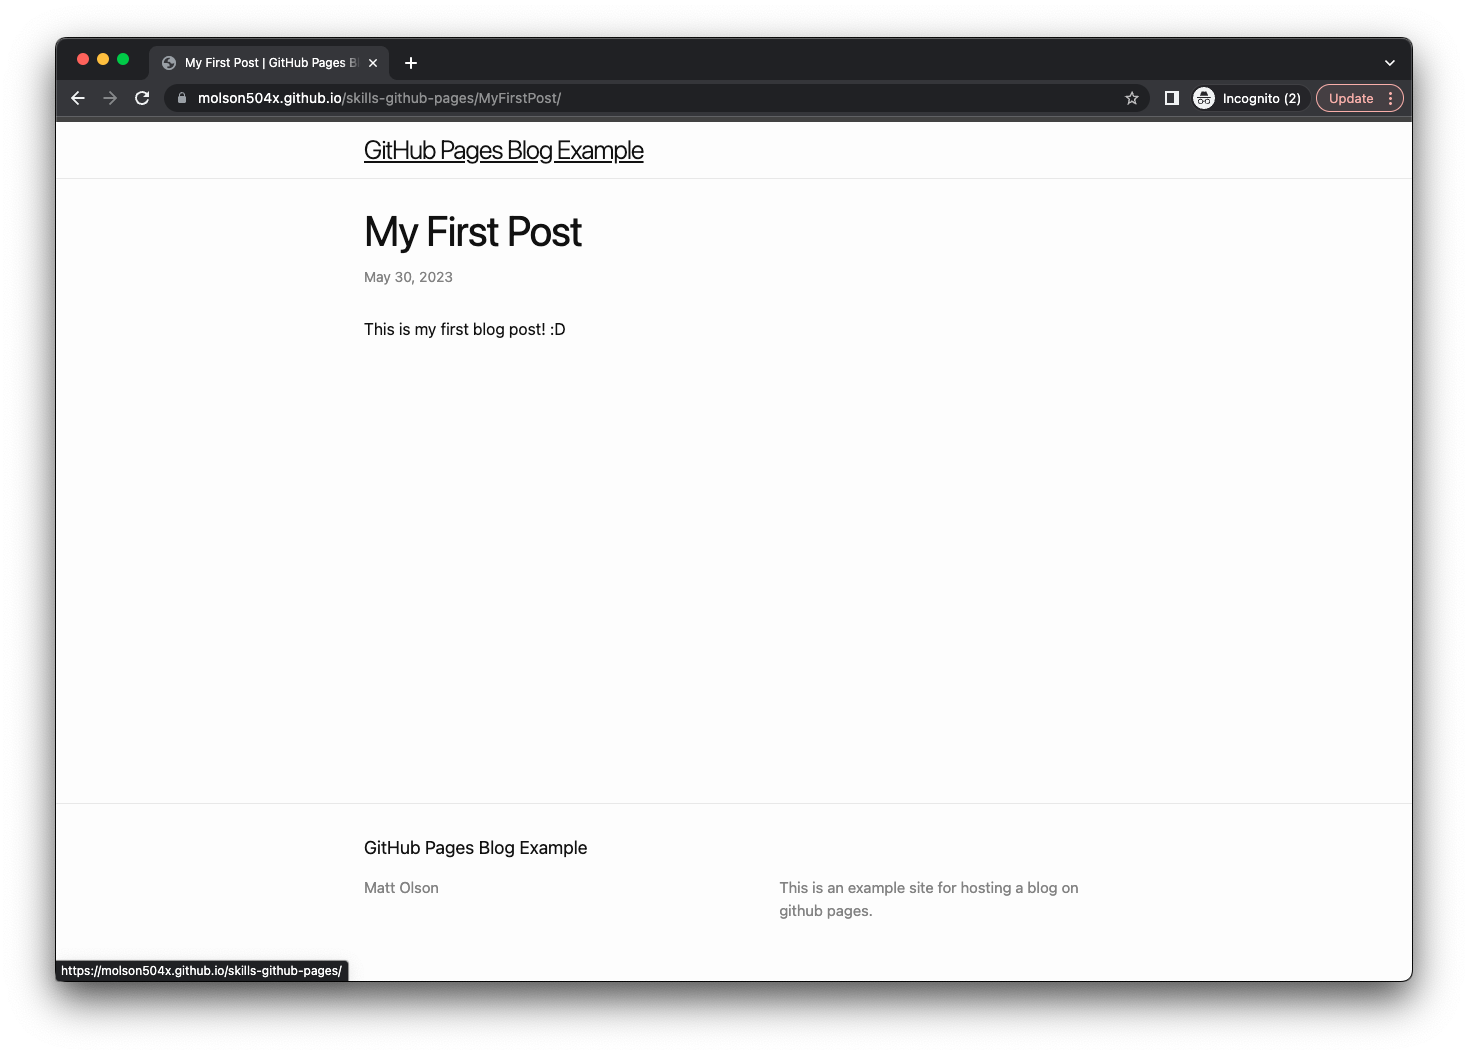
And just like that, you’ve got a blog site set up! Now it’s time to make your first post. This is pretty easy - it’s a markdown file, something like this:
---
title: "My First Post"
date: 2023-05-30
---
This is my first blog post!  :D
You’ll need to save your file using a specific format: yyyy-mm-dd-title (ex: 2023-06-05-How-I-Started-My-Blog-In-Under-An-Hour.md). Save that into a folder named _posts and you’ll have your first blog post! It should show up around 20-30s after you merge your changes into your master branch.
 )
)
 )
)
Conclusion
And now, there you go. You’ve set up your first blog site in under an hour, hosted on GitHub pages. Of course, there’s lots of extra customization you can do with themes and other Jekyll plugins, but this is the basics to get a blog set up.