
Xebia Innovation Day - Creating a GitHub Copilot VSCode Chat Extension
Before we begin, I just want to say thank you to Xebia for encouraging all of us to be innovative, explore, learn, and share our knowledge with others. I am truly blessed to work for such an awesome employer. Today was Innovation Day at Xebia, which is one of my favorite parts of being a consultant here. On Innovation Day, we shut down our regular client work and instead team up to try to create something new and interesting (and maybe innovative). There are two main rules - you have to learn something new, and you cannot work on anything client-related. At the end of the day, we all come together to show off what we did and what we learned, and it’s always a lot of fun.
For my project today, I decided to work with a small team (consisting of David Daniels, Bill Carlson and myself) to create a VSCode Chat extension for GitHub Copilot. This is a bit different than a GitHub Copilot Extension since it is tightly integrated into Visual Studio Code. If you’re interested in seeing how to develop a GitHub Copilot Extension, my colleague, Rob Bos, wrote a great post on that topic. Spoiler alert - if you like pirate-speak it’s pretty cool ![]() .
.
This post is a recap of our day, and a breakdown of what we learned and how we accomplished our goal.
The Idea
In VSCode, there’s an extension (the mssql extension) that allows you to connect to a MS SQL (or Azure SQL) database and, among other things, run queries and view schemas. Unfortunately, Copilot doesn’t know how to talk to this extension, so the only way to get Copilot to help with writing queries is to have the schema files as part of the workspace (either in SQL files or as a SQL project), or to pass the schema as part of your prompt. Once Copilot knows the Schema it’s working with, it’s good at helping write queries.
We wanted to see if we could make it even easier by having Copilot read the schema from the database directly. Sounds simple enough, right? Welllllll….
Step 1 - Scaffold The VSCode Chat Extension
As it turns out, this was the simplest part of the day. VSCode chat extensions are surprisingly easy to write. In fact, I walked into today having already demo’d a chat extension that I wrote for one of our Xebia Knowledge Exchange sessions. This extension was a simple chatbot that answered questions in the voices of various Star Wars characters (the code is available in the molson504x/copilot-custom-extension repo on my GitHub). There’s a bit of boilerplate code, so let’s dive into some of the structure of a VSCode Chat Extension.
High-level structure of a chat extension
The folder structure for our extension looks something like this:
.
├── README.md
├── assets
├── package.json
├── src
│   ├── constants.ts
│   ├── error-handler.ts
│   ├── extension.ts
│   ├── handlers
│   │   └── sql-helper.ts
│   ├── helpers
│   │   └── mssql-helper.ts
│   ├── logger.ts
│   └── prompts
│       └── sql-helper-prompts.tsx
└── tsconfig.json
The src folder contains all of our source code, so that’s what we’ll focus on. Here’s a breakdown of some key files/folders:
-
extension.ts- This is the main entry point for our extension, and is where we define the extension and register our chat participants. -
handlers- Contains our chat participant handler. -
helpers- Contains any helper classes that we use throughout our extension (like our mssql helper). -
prompts- Contains our prompt elements that we use to render messages to the chat window.
Also notably outside of the src folder is the package.json file, which contains information about the extension and is used by VSCode to know how to load the extension, along with a directory to store any miscellaneous assets (like a participant icon) and a tsconfig.json file to define our TypeScript configuration.
Define the extension
VSCode Extensions are written in TypeScript, and contain a package.json file which defines some information about the extension. Chat Extensions in VSCode are no different, but they contain one extra bit of information - the contributes.chatParticipants section. This is where you define information about Chat Participants, namely the ID, Name, Description, and Commands which a user would use to interface with a participant. It looks something like this:
{
    "contributes": {
        "chatParticipants": [
            {
                "id": "xebia.sql-helper",
                "name": "Sql-Helper",
                "description": "Helps write SQL queries based on the open database connection in the mssql extension",
                "isSticky": true
            }
        ]
    },
}
This information also helps VSCode know what to display when you run the /help command in the chat window, so it’s important that this information provides enough information to the user to know how to interact with the participant. Think of this as your documentation.
Define The Chat Participant Handler
Chat commands need to be handled by a handler. Chat handlers define how the extension should handle the user’s prompts and commands, and also is responsible for streaming progress indications and output indications to the chat window. This is a boilerplate implementation of our chat handler, before we added any other logic to it:
export async function sqlHelperHandler(request: vscode.ChatRequest, context: vscode.ChatContext, stream: vscode.ChatResponseStream, token: vscode.CancellationToken): Promise<IChatResult> {
    stream.progress('Getting you a SQL query to run...');
    try {
        const [model] = await vscode.lm.selectChatModels(MODEL_SELECTOR);
        if (model) {
            // Do something useful here, this is just boilerplate...
            stream.markdown(`User's Prompt: ${request.prompt}`);
        }
    }
    catch (err) {
        handleError(logger, err, stream);
    }

    logger.logUsage('request', {kind: 'sql-helper', prompt: request.prompt});
    return {metadata: {command: request.command ?? 'sql-helper', prompt: request.prompt}};
};
This handler is pretty simple - it just logs the user’s prompt to the chat window. It also selects which model we want to use for servicing our prompts later on, and MODEL_SELECTOR is a constant which points to the GPT-4o model. We’ll add more to it later, but this is a good starting point. I also had boilerplate for error handling and logging, but I won’t bore you with that. It just logs debug information to the console.
Register the Chat Participant
The last step in creating a chat participant is to register it with the VSCode API. This is done in the activate function of your extension, and looks something like this:
export function activate(context: vscode.ExtensionContext) {
    const sqlHelper = vscode.chat.createChatParticipant(SQL_HELPER_PARTICIPANT_ID, sqlHelperHandler);
}
In our case, SQL_HELPER_PARTICIPANT_ID is a constant that we defined which matches the ID from our package.json file. This is how VSCode knows which handler to call when a user interacts with the chat participant. And that’s it, right? Well, kinda. Here’s where we had to start getting creative.
Step 2 - Connecting to the Database (aka - The Hard Part)
The next step was to call the mssql extension to connect to the database and get the schema. This turned out to be a bit harder than we thought, and since we were running low on time (and this was a proof-of-concept) we decided to cheat a little and instead just create a command to set the Connection String and bypass the mssql extension entirely (remember that /connect command in our chat participant declaration?). We’ll go back and fix that later (maybe) but for now, we just wanted to get something working. Our goal was to show off Copilot, not the mssql extension.
Our Database Helper
We created a helper class with one goal in mind - interface with the mssql extension. This was the hardest part of the day, but definitely the most rewarding to see it working. We used a little help from Copilot to figure out how to do this, and also had to figure out how to interface with the VSCode Language Service (and how they implemented this service for SQL). At the end, this turned out to be a simple few lines of code that took close to 6 hours to figure out.
Let’s break down what did.
First, was getting a reference to the extension activating it if it hadn’t already been activated. In theory, we shouldn’t have had to do this but it’s good to validate things. We also went ahead and got a reference to the mssql extension’s exports, which we used as our “API” to interact with the extension.
const mssqlExtension = vscode.extensions.getExtension('ms-mssql.mssql');
if (!mssqlExtension.isActive) {
    await mssqlExtension.activate();
}
const mssqlApi = mssqlExtension.exports;
Next, we had to connect to the database. This was a bit tricky to understand since it required two steps - retrieve a stored connection profile URI, and then use that to connect to the database. It’s two lines of code, but it took us a long time to understand - mostly because of the URI that gets returned from the connect() call, which looks weird (something like vscode-mssql-adhoc://query0). This threw us through a loop since we didn’t understand what this URI was used for, but eventually we figured it out.
const connectionProfile = await mssqlApi.promptForConnection();
const connection = await mssqlApi.connect(connectionProfile.connectionUri);
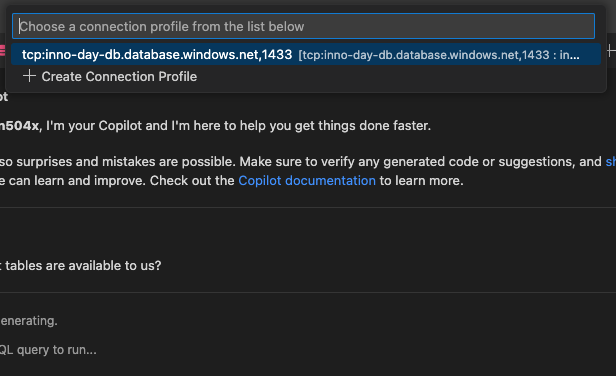
That call to promptForConnection() is what prompts the user to select a connection profile from the mssql extension. This produces the normal connection dialog that you would see if you were to connect to a database in the mssql extension. Once the user selects a connection, we then call connect() to actually connect to the database, which is what tells the mssql extension to connect to the database and return a connection URI (that weird URI I mentioned earlier).
Our query that we used to get the table schema was pretty standard:
SELECT CONCAT(tables.TABLE_SCHEMA, '.', tables.TABLE_NAME) AS TABLE_NAME, columns.COLUMN_NAME, columns.DATA_TYPE
FROM INFORMATION_SCHEMA.TABLES as tables
INNER JOIN INFORMATION_SCHEMA.COLUMNS as columns ON tables.TABLE_NAME = columns.TABLE_NAME
WHERE tables.TABLE_TYPE = 'BASE TABLE'
And we then had to figure out how to send this query through the mssql extension. We started by digging through the mssql extension code, which is where we found information on what sendRequest() does - it sends a command and parameters to a SqlToolsServiceClient, which is just an extension of a LanguageClient. If it’s a client that means there’s a server somewhere, right? This is where things got tricky, and we eventually found the documentation on the VSCode Language Server, and then from there wound up finding the repository which contains the implementation of this service for SQL Server (microsoft/sqltoolsservice). From there, we found information on the JSON-RPC Protocol used to communicate with this service, and eventually found the right RPC command to pass in along with its parameters. This was a bit of a rabbit hole, but we eventually got it working.
const result = await mssqlApi.sendRequest('query/simpleexecute', { ownerUri: connectionUri, queryString: tableColumnQuery });
No, really, that’s it. One line of code that took us HOURS to figure out. From there, we flattened the 2D array representation of the returned rows into our desired JSON object and then returned it to our chat handler.
We want to go back eventually and clean this implementation up so that it doesn’t prompt the user every time they use this chat handler, but this is a proof-of-concept and it was a miracle that we got it working at all. We were pretty happy with this result.
Passing the Schema to Copilot
Once we had the helper class written, we could then get the schema and pass it into Copilot as part of our prompt. This was also a bit tricky, and required us to make a couple of assumptions for this POC:
- This would be a small enough schema to avoid hitting the token limit of the model.
- We only cared about the table columns, not indexes, FK’s, etc…
- We would go back later to pre-flight the schema and only pass the table schema for tables that were relevant to the user’s prompt.
To do this, we dynamically rendered a prompt (a series of messages) to pass into Copilot by using a PromptElement implementation along with the vscode renderPrompt() function. A PromptElement is a way to define a series of messages which should be rendered and sent to Copilot as the prompt. For example, this is the PromptElement we used to render the message containing the schema definition:
class TableSchemaPrompt extends PromptElement<PromptProps, void> {
    render(state: void, sizing: PromptSizing) {
        return (
            <>
                <UserMessage>
                    ## Table Schema (Database Schema)

                    This is a JSON representation of the table schema for the database being asked about.
                    The schema is described as follows:

                    Each object in the array represents a table in the database.  The key is the name of the table.
                    The value is an array of strings, where each string represents a column in the table along with its data type.

                    ``` JSON
                    {JSON.stringify(this.props.tableSchema)}
                    ```
                </UserMessage>
            </>
        );
    }
}
A PromptElement can contain other PromptElements, so we could have a series of messages that would be sent to Copilot as part of the prompt. This is what we actually rendered as our prompt:
export class SqlHelperPrompt extends PromptElement<PromptProps, void> {
    render(state: void, sizing: PromptSizing) {
        return (
            <>
                <PersonalityPrompt {...this.props} />
                <TableSchemaPrompt {...this.props} />
                <UserMessage>
                    ## Query Details (User Input

                    {this.props.userQuery}
                </UserMessage>
            </>
        );
    }
}
This PromptElement generated three messages:
- Define the chat participant’s personality and any extra information and expectations about the participant.
- Create context about the table schema from our database
- The user’s query (which contains the prompt from the user - the desired SQL query)
Oh, and that this.props object? Yep - that’s custom too. When you define a PromptElement you have to also pass in an object containing properties about the prompt. In our case, that’s the user’s query as well as the table schema.
Pass this all into Copilot…
Ok, so we have our PromptElement defined. It’s now time to start implementing our handler and adding actual logic to it.
Our handler started to take shape:
const tableSchema = await getTables();

const {messages} = await renderPrompt(
    SqlHelperPrompt,
    { userQuery: request.prompt, tableSchema: tableSchema},
    { modelMaxPromptTokens: model.maxInputTokens },
    model
);

const chatResponse = await model.sendRequest(messages, {}, token);

for await (const fragment of chatResponse.text) {
    stream.markdown(fragment);
}
Ok, let’s break this down. First, we get our table schema. Yes, we are getting this on every request. Yes, we know this is bad. We’ll fix it later.
Next, we render our prompt using the renderPrompt() function. This function takes a PromptElementCtor and the properties to pass into it, along with some other options. We then send this prompt to Copilot using the sendRequest() function on our model, which sends the fully assembled prompt off to Copilot, and then we wait for the magic to happen and render the response to the chat window.
So, why a for await loop there? Well, Copilot sends back a stream of messages, and we have to handle each message as it comes in. That’s why you’ll see Copilot Chat (and other GenAI tools) slowly render text to the screen - it’s sending back a stream of messages, not just one big message.
The Result
For our proof-of-concept, we also spun up the AdventureWorks database in an Azure SQL instance and connected to it. We then asked Copilot to help us write a couple of queries of varying complexity.
Query 1 - “Create a query to get all products”
We decided to start simple, and it did a good job. Not only did it return a query that would work, it also described what the query did and what table it would “focus” on.
To retrieve all products, we will focus on the
SalesLT.Producttable. Here’s the SQL query to get all information from theSalesLT.Producttable:SELECT * FROM SalesLT.Product;Running this query will return all columns and rows from the
SalesLT.Producttable, which includes details such asProductID,Name,ProductNumber,Color,StandardCost,ListPrice, and more.If you only need specific columns, you can list them accordingly. For instance, if you only want to see
ProductID,Name, andListPrice:SELECT ProductID, Name, ListPrice FROM SalesLT.Product;Feel free to adjust the column selection as needed.
Query 2 - “Create a query to get a customer’s information, and a count of the number of orders each customer has placed.”
This query is a bit more complicated, as it should require doing some table joins. This means Copilot would now need to understand how to join tables together and be aware of the table schemas enough to infer which tables should be joined together. And it did a pretty good job!
Analysis
To generate the required query, we need to focus on the following tables:
SalesLT.Customer- to get customer information.SalesLT.SalesOrderHeader- to get and count the orders placed by each customer.SQL Query
Here is the SQL code to achieve the desired result:
SELECT
   C.CustomerID,
   C.FirstName,
   C.MiddleName,
   C.LastName,
   C.CompanyName,
   C.EmailAddress,
   C.Phone,
   COUNT(SOH.SalesOrderID) AS OrderCount
FROM
   SalesLT.Customer C
LEFT JOIN
   SalesLT.SalesOrderHeader SOH ON C.CustomerID = SOH.CustomerID
GROUP BY
   C.CustomerID,
   C.FirstName,
   C.MiddleName,
   C.LastName,
   C.CompanyName,
   C.EmailAddress,
   C.Phone
ORDER BY
   C.CustomerID;
Additional Information
This query uses a
LEFT JOINto ensure that we include customers with no orders as well, displaying anOrderCountof 0 for such customers. TheGROUP BYclause is used to group the results by customer, allowing us to apply theCOUNTfunction on theSalesOrderIDto get the number of orders each customer has placed. The results are then ordered byCustomerID.
We were pretty happy with these results, but just to be sure we did double-check the results against the actual table data since we thought we noticed a weird behavior caused by that GROUP BY clause. Turns out Copilot was correct, and we were able to get the results we wanted. Let’s dial it up a little bit more though…
Query 3 - Something much more complex…
For this one, we wanted to really push the AI’s analytical nature, and make it have to do some complex joins and aggregations. We devised a prompt that should require at least one CTE in order to complete the request because of how the data is structured.
Write a parameterized query to generate a complete invoice for all orders containing at least one product from the “Mountain Bikes” category (or any child categories under the “Mountain Bikes” category). These invoices need to show ALL products included as part of the order; do not filter the ordered products by the “Mountain Bikes” category. Take into consideration that an individual order may contain items which are not in a Mountain Bikes category, and these items should also be returned. For example, if an order contains items from the Mountain Bikes category and the Clothing category, all of the items should still be displayed.
Seems like we had to be pretty verbose here, and we did. There’s a little bit of prompt engineering that went into getting the best result possible out of Copilot, but we ended up with a pretty good result:
Analysis
To generate the required invoices, we need to:
- Identify the “Mountain Bikes” category and any child categories under it.
- Retrieve all orders that contain at least one product from the “Mountain Bikes” category.
- Display all items for these orders, regardless of category.
Relevant tables:
SalesLT.Product: containsProductID,ProductCategoryIDSalesLT.ProductCategory: containsProductCategoryID,ParentProductCategoryID,NameSalesLT.SalesOrderHeader: containsSalesOrderID,CustomerID, and order detailsSalesLT.SalesOrderDetail: containsSalesOrderID,ProductID,OrderQty,UnitPriceSalesLT.Customer: containsCustomerID, customer detailsSQL Code
-- Common Table Expression (CTE) to recursively find subcategories of "Mountain Bikes"
WITH CategoryCTE AS (
    SELECT ProductCategoryID
    FROM SalesLT.ProductCategory
    WHERE Name = 'Mountain Bikes'

    UNION ALL

    SELECT sc.ProductCategoryID
    FROM SalesLT.ProductCategory sc
    INNER JOIN CategoryCTE cte ON sc.ParentProductCategoryID = cte.ProductCategoryID
)

-- Main query to generate invoices
SELECT
    soh.SalesOrderID,
    soh.OrderDate,
    soh.CustomerID,
    c.FirstName,
    c.LastName,
    sod.ProductID,
    p.Name AS ProductName,
    sod.OrderQty,
    sod.UnitPrice,
    (sod.OrderQty * sod.UnitPrice) AS LineTotal
FROM
    SalesLT.SalesOrderHeader soh
INNER JOIN
    SalesLT.SalesOrderDetail sod ON soh.SalesOrderID = sod.SalesOrderID
INNER JOIN
    SalesLT.Product p ON sod.ProductID = p.ProductID
INNER JOIN
    SalesLT.Customer c ON soh.CustomerID = c.CustomerID
WHERE
    soh.SalesOrderID IN (
        SELECT DISTINCT sod.SalesOrderID
        FROM SalesLT.SalesOrderDetail sod
        INNER JOIN SalesLT.Product p ON sod.ProductID = p.ProductID
        WHERE p.ProductCategoryID IN (SELECT ProductCategoryID FROM CategoryCTE)
    )
ORDER BY
    soh.SalesOrderID, sod.ProductID;
Additional Information
- Ensure that indexing is properly set on
ProductCategoryIDandSalesOrderIDcolumns to optimize query performance.- The CTE is used to handle hierarchical category structure, allowing us to find all subcategories of “Mountain Bikes”.
- The
WHEREclause in the main query’s subquery ensures we only include orders that have at least one product from the specified category.
This query looks pretty complex, and that’s because it is. Part of why we had to get so verbose with our prompt was because this extension still doesn’t have knowledge of the underlying data, so it can’t infer things like the hierarchical structure of the ProductCategory table. We had to be very explicit in our prompt to get the best result possible, and it worked out pretty well. Not only that, but it also proactively recommended indexing strategies to optimize the query performance. Pretty cool!
Query 4 - Explain the tables
Sooooooo great, Copilot can help us write queries based off of the schema. Can it explain the Schema to us? We decided to find out, and prompted it with:
Explain what each table in the database contains. Don’t go too deep into each column, just an explanation is fine. This explanation can also include important columns in each table, but only if that information is relevant to explaining what’s in the table.
It did a pretty good job. Keep in mind, the only thing this extension is feeding into the model is the table schema, so it doesn’t know anything about the data in the tables. It’s just looking at the columns and their data types. Here’s what it came up with:
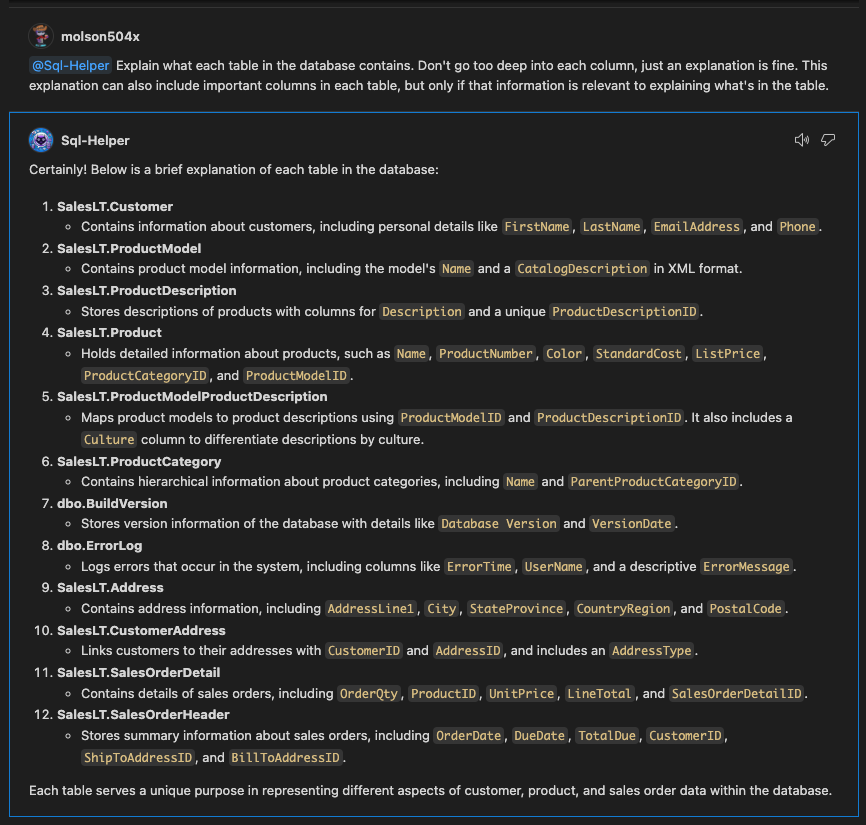
I’d say based off of that it did a good enough job. It’s not perfect, but it’s a good start. We could probably improve this by adding more context to the prompt, but for a POC this is pretty good.
Conclusion
And… that’s it! Right? Well, at this point we had a functional proof-of-concept. And that’s what we demo’d to the rest of the team. We had a working chat participant that could connect to a database, get the schema, pass it along to Copilot, and generate a query based off of a user’s prompt. There are a few things that we want to go back and improve upon:
- Pre-flight the schema and only pass the relevant tables to Copilot. This will help with the token limit issue for large databases.
- Cache the schema so we don’t have to get it on every request.
- Don’t prompt the user for the connection every time. That’s annoying.
- Right now there’s no concept of chat history, so this extension isn’t very conversational. We’d like to add that in the future.
- Right now we only take the table schema into account - as in the columns and their respective data types. In the future, we’d also like to account for things like indexes, foreign keys, etc… Also things like Views, Stored Procedures, etc…
All in all, this was a HUGE success, and we learned a ton. This is proof that the Copilot Extensions ecosystem is going to be a game-changer for GitHub Copilot, and I really wanted to see just how far we could push this tool to enhance a very common ask I have from clients. This is what Innovation Day is all about - trying something new, learning, and sharing that knowledge with others. And if you think this project was cool, you should see what some of my other colleagues came up with. ![]()